Project:
Outdoor Projector Screen
Size: 20' wide by 10' tall (actual image size will be around 220" diagonal)
Total time it took to complete:
Unknown. Many hours spent researching for best possible solution. Not a small project and I want it done right the first time. I am picky at times and if it is not done right, I will end up re-doing it.
Also, project has been dragging on due to delayed / extremely slow shipping.
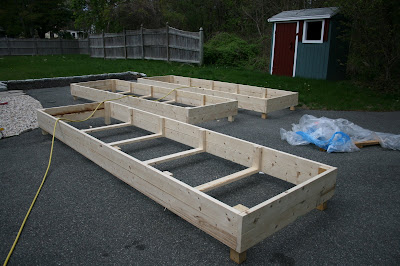
Picture of the frame (missing the legs - still deciding on how far I want the frame to be from the ground). Frame does not look squared because it is not mounted, just test fitting it right now.
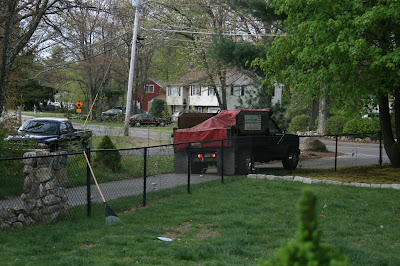
Here are one of the cement footings for the anchor footpads (3 in total) - 1/2" by 12" rods were placed into the wet cement for the anchor (shown below).
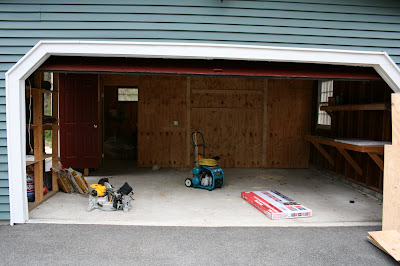
Picture of some of the stuff I used/will be using.
Shown below is of the following:
(5) anchor footpads *mentioned above
(12) 1/2" by 12" L rods - sets in wet cement *mentioned above
250ft roll of 3/16" aircraft grade wire rope (breaking strength of 4200~lbs)
Wire rope cutter
(5)Turnbuckles
(50) clamps
+ etc.
Took me awhile to figure out how to keep the screen up and being able to withstand windy conditions. I am going with tensioned wire rope. Lets hope it works out. Note that I did not need 250ft of wire rope BUT it was cheap online compared to buying a shorter length of it at your local Home Depot/Lowes. Very useful for other things...
Still waiting for the 20' by 10' white poly tarp that I will be using as screen material to arrive....
Hopefully this will be completed by the end of this week.
Updated (June 07, 2009):
The screen is finished in time. The frame came out really nice. I am not that satisfied with the tarp material though (too much hotspotting from the shiny material, will upgrade later on but for now its fine).
All three cement footings with the anchor footpads + leg installed.
Closeup of the middle support - not bolted down yet, test fitting still
The final frame design - missing middle vertical EMT support in pic - notice 90lb dog in picture for size comparison
And here is the final results with the poly-tarp installed. Picture taken in pitch dark through window...
Monday, June 1, 2009
Received my order of bulbs from online
Renovating Garage Part 1
Project:
Garage renovation
-Break down wall
-Remove door+frame
-Remove studs
-Remove wiring
Total time it took to complete:
Will be doing this project one step at a time.
----Time it took to remove wall, studs, and wiring - basically everything shown below - less than one day.
Here is how the garage looks without the storage room/closet that I took down (not shown nor did I take any pictures of it) - with my tools and wood that was used for prior projects.
Wall removed.
Studs removed.
Stay tuned for part 2 in a couple of weeks...
-----some plans in mind:
Remove all wood shelving
Rewire the garage
Insulate all walls with R-13
Put up drywall
Monday, May 11, 2009
300 Gallon Rainwater Harvesting System
Project:
300 Gallon Rainwater Harvesting System
Consists of (6) - 55 gallon translucent polypropylene barrels
Mag 9.5 Pump for pressurizing hose for watering - ok to use for now but will upgrade to something more suitable for this application - not enough pressure
Total time it took to complete:
A few days...took a few hours to make up a stand that will work best with the setup I came up with + be able to handle the weight of a full barrel (400+lbs) with no problem.
Most time consuming was figuring out how to connect the barrels together, being able to disassemble it if needed, and finding the best way possible to get the water out of the barrel.
Here is a picture of one of the stands already built.
All the stands were made out of 2x4s fastened together with 3.5" framing nails. Very strong.
Shown below is another stand being put together, from start to finish, this one just to hold one barrel.
The legs for the stand consist of (4) 4x4 - made out of (2) 2x4 put together. Each barrel has 4 supporting legs.
And here is the stand completed. Next to it is the stand for two barrels. I also made another stand, for three barrels (not shown). Only difference between a single barrel stand vs a multiple barrel stand is that there is an additional piece of 2x4 bracing the two legs together - shown below.
And here is the picture of where I placed the barrels (somewhat blurry because I took the picture in pitch dark), two of the other barrels are on the left side, where the pump is located to pressurize the hose for watering. Barrels are located on the side of the house where nobody sees often, very well placed and hidden from the public eyes lol.
Have more pictures but do not have it on me right now, will update later on....
Finally updated (May 31, 2009):
Up-close picture of how the barrels are linked to each other. Union fittings were used for each connection to barrel in case I need to disconnect the system.
Pictures of the final setup. Notice the left barrel with the gutter run-off.
The only difference in the picture below is that I placed the other gutter run-off into the barrel.
....still missing the picture of how the water is accessible
Sunday, May 3, 2009
Garden Bed Boxes
Project:
(4) Garden Bed Boxes (14'L x 4'W x 11"D)
Total time it took for me to build:
Less than 1 day
Wood is delivered to house from lumber yard.
Consist of 2x4x14, 2x6x14, 2x6x16
Most of the cutting were done in the garage. The red box contained a 5 shelf/workbench that I used with my miter saw.
All lumber pieces are transported into the garage.
Here is a picture of my work in progress (all of the required 2x4s are cut) - The wood on the right are used for building the box, left side are scraps.
First box being built (prototype).
The box is raised due to the corner legs sticking out 5", they will be planted into the ground, and the sides of the box will be touching the ground. Right now, the box is still not finished yet, and for this prototype, one of the cross-braces was not spaced correctly (does not affect integrity of the box).
Here are three more boxes being built...
Cross-braces are placed and fastened in each of the three boxes (4 cross-braces per box).
Now for the final product...the top of the box has a mitered 2x6 ledge for aesthetics as well as a place to sit while gardening.
-----Day 2-----
(3) Truckloads of loam and mulch being delivered and dumped onto driveway.
And the third load - 3 cubic yards of mulch
(4) Garden Bed Boxes (14'L x 4'W x 11"D)
Total time it took for me to build:
Less than 1 day
Wood is delivered to house from lumber yard.
Consist of 2x4x14, 2x6x14, 2x6x16
Most of the cutting were done in the garage. The red box contained a 5 shelf/workbench that I used with my miter saw.
All lumber pieces are transported into the garage.
Here is a picture of my work in progress (all of the required 2x4s are cut) - The wood on the right are used for building the box, left side are scraps.
First box being built (prototype).
The box is raised due to the corner legs sticking out 5", they will be planted into the ground, and the sides of the box will be touching the ground. Right now, the box is still not finished yet, and for this prototype, one of the cross-braces was not spaced correctly (does not affect integrity of the box).
Here are three more boxes being built...
Cross-braces are placed and fastened in each of the three boxes (4 cross-braces per box).
Now for the final product...the top of the box has a mitered 2x6 ledge for aesthetics as well as a place to sit while gardening.
-----Day 2-----
(3) Truckloads of loam and mulch being delivered and dumped onto driveway.
Loam is used for the garden bed boxes.
Mulch is for the black area on the right next to fence.
First load of loam being dumped.
Final results: 7 cubic yards of loam
First load of loam being dumped.
Final results: 7 cubic yards of loam
And the third load - 3 cubic yards of mulch
Here are the garden bed boxes being placed into the ground...
Back to the mulch, loaded onto a dump cart (max 600lbs capacity).
Moved and used 4-5 carts full of mulch to fill up the side of the house.
Three garden boxes in the ground, one left to go.
Subscribe to:
Posts (Atom)